|
10-9
建立企業網站
- WordPress
內容:
10-9-1
企業網站與 Wordpress
簡單介紹
Wordpress
功能:
1.
是目前最風行的網站套件之一,可安裝於
Linux 或
Windows Server
上。
2.
免費版本是簡單的陽春版,依照需要再購買其它功能套件,大多不會很貴。如要建立一個版面漂亮、管理能力較強的企業網站,可能需要購買功能性較強的套件來安裝,但無論如何比請專業人士設計網站便宜許多。
3.
Wordpress 內容有文章與網頁兩種格式,文章有類別歸納整合,使文章之間建立聯繫,大多使用於
“個人部落格”
使用。每張網頁都是獨立的,之間須靠超連結聯繫,大多使用於
“企業網站”
使用。但網站內允許同時建立文章與網頁共存,看個人需要而定。
4.
至於如何美化
Wordpress
網站並非本書課程,請讀者自行研習或參考其他書籍。
吾人在
CentOS7 上安裝完成
LAMP 伺服器後,即可安裝
WordPress
建立企業網站或個人部落格。建立之前須確定下列事項:
(1)
在
CentOS 8 系統上完成
LAMP 安裝與設定;
(2)
PHP
版本需
7.0 以上;
(3)
在
Mariadb/MySQL 上建立專屬資料庫;
(4)
下載並安裝
WordPress
套件;
(5)
建立企業網站(或個人部落格);
(6)
重點聲明:安裝後的WordPress
是陽春的免費版本,如要增加網站管理功能,須購買其他套件安裝,可以選擇需要的功能購買,但價錢大多很便宜。
10-9-2
建立網站專屬資料庫
- MySQL
企業網站上所有文章、網頁與圖片索引都需要資料庫儲存,如此比較容易管理,因此,利用
WordPress
所建立的企業網站都需要一只資料庫。吾人已將
CentOS/Linux
安裝LAMP
伺服器系統,它能滿足
WordPress
系統的需求,但還是需要建立一只專用資料庫。
備註:本範例在
MySQL
上建立
superuser
帳戶負責管理資料庫為例。(如個人網站也需另建一個帳戶與資料庫)
首先以
MySQL
的
root
帳號登入:
|
[root@serCourse
~]#
mysql -u root -p
Enter
password: [輸入密碼
123456] |
1.
建立網站資料庫
– wordpress
|
MariaDB [(none)]>
create database `wordpress`;
(`
是反向單引號’)
Query OK,
1 row affected (0.00 sec)
MariaDB
[(none)]>
show databases;
[顯示所建立的資料庫
wordpress] |
2.
建立MySQL
使用者
– superuser
備註:`superuser`@`localhost`,
必須反向單引號。密碼:’123456’
是正向單引號。
|
MariaDB [(none)]>
create user `superuser`@`localhost`
identified by '123456';
Query OK,
0 rows affected (0.01 sec)
MariaDB
[(none)]>
select
Host, User from mysql.user;
[顯示所建立的使用者
superuser]
+-----------+-----------+
| Host | User |
+-----------+-----------+
| 127.0.0.1 | root
|
| ::1 | root
|
| localhost | root
|
|
localhost | superuser |
+-----------+-----------+ |
3.
授權
user01
資料庫給
user01
使用者管理。
|
MariaDB [(none)]>
grant all on wordpress.* to `superuser`@`localhost`;
Query OK,
0 rows affected (0.01 sec)
MariaDB
[(none)]>
flush
privileges;
Query OK,
0 rows affected (0.00 sec)
MariaDB
[(none)]>
quit
Bye |
4.
檢視使用者所屬資料庫權限
|
[root@serCourse ~]#
mysql -u superuser -p
Enter
password: [密碼
123456]
Welcome to
the MariaDB monitor. Commands end with ; or \g.
Your
MariaDB connection id is 4
…..
MariaDB
[(none)]>
show databases;
+--------------------+
|
Database |
+--------------------+
|
information_schema |
|
wordpress |
+--------------------+
2
rows in
set (0.00 sec)
MariaDB
[(none)]>
quit
Bye |
5.
如果建立錯了欲刪除資料庫與使用者,命令如下:(參考使用)
|
[root@serCourse ~]#
mysql -u root -p
Enter
password: [密碼
123456]
MariaDB
[(none)]>
drop
database `data1`; [刪除資料庫
data1]
….
MariaDB
[(none)]>
drop
user `user01`@`localhost`; [刪除帳戶
user01]
|
10-9-3
安裝企業網站套件
- Wordpross
(A)
提升PHP
版本
PHP
版本需
PHP7.3
以上的版本才能安裝
Wordpress
套件。CentOS
8
安裝
Apache
套件時,如果沒有特地提升的話,Wordpress
將無法運作。
1.
觀察目前
PHP
版本:
|
#
dnf module list php [查閱目前
php
與預設
7.2
版本]
….
Name
Stream Profiles Summary
php
7.2 [d][e]
common [d], devel, minimal
php
7.3 common [d], devel, minimal
php
7.4 common [d], devel, minimal
… |
2.
提升
PHP
版本到
7.3
版
|
#
dnf module reset php:7.2
#
dnf
module enable php:7.3
[啟動
7.3
版本]
#
dnf
module list php
Name
Stream Profiles Summary
php
7.2 [d] common [d], devel, minimal
php
7.3 [e]
common [d], devel, minimal
php
7.4 common [d], devel, minimal
…. |
3.
重新啟動
Apache:(沒有重新啟動無法執行)
|
#
systemctl restart httpd |
(B)
下載安裝
Wordpress
套件
備註:(1)
本範例以建立主網站為範例,接下來的操作皆以
root
帳戶登入,再安裝設定網站功能。
(2)
如安裝個人網站,則使用者帳號
(如
student01)
登入後,在其家目錄下執行下列程序。
1.
以
root
帳號登入,再下載
wordpress
最新版本:
|
# wget
https://tw.wordpress.org/latest-zh_TW.zip
--2020-02-05 16:39:05-- https://tw.wordpress.org/latest-zh_TW.zip
正在查找主機
tw.wordpress.org (tw.wordpress.org)... 198.143.164.252
正在連接
tw.wordpress.org (tw.wordpress.org)|198.143.164.252|:443...
連上了。
…
#
ls
latest-zh_TW.zip
…
# |
2.
解壓縮套件:
3.
將
wordpress套件轉移到
/var/www/html
目錄下:(如個人網站則複製到 public_html 目錄下)
4.
建立
uploads
目錄下:(目前在
/var/www/html
目錄下)(如個人網站則在
public_html 目錄下)
(B)
設定企業網站
- Wordpress
套件
1.
安裝完成wordpress
後,即可進入設定企業網站:(由瀏覽器進入
http://192.168.1.107)
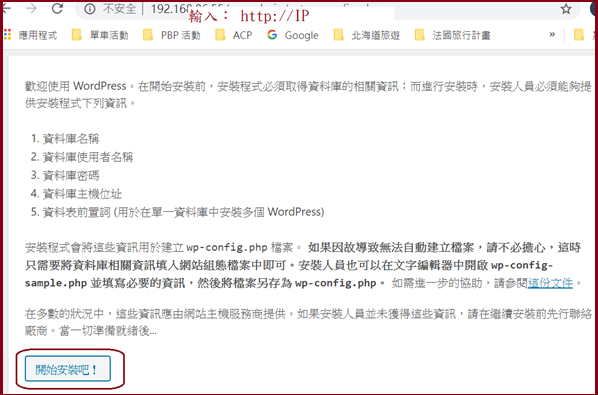
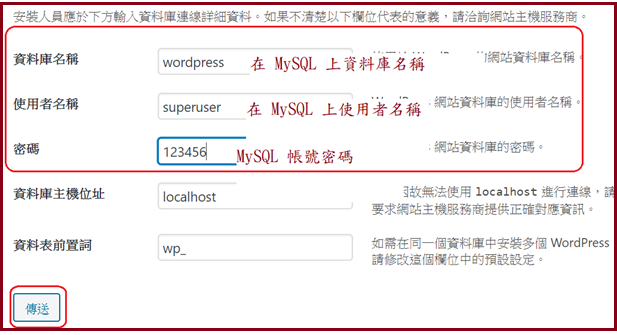
進入後,填寫
MySQL
資料庫上的相關資料,如下:
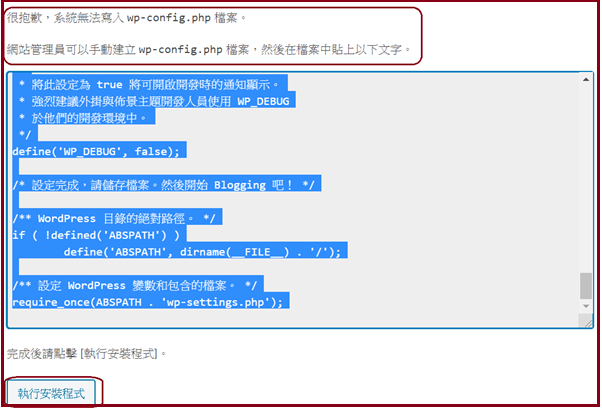
如果出現下面訊息,表示系統無法自動產生
wp-config.php
檔案。吾人可登入
Centos 7
系統(以
root
帳號,再切換目錄到 /var/www/html),利用
vi
產生該檔案,將此內容複製進去。
操作如下:
1.
將網頁上內容複製下來;
2.
執行#
vi wp-config.php
進入
vi
編輯環境,再輸入
i
使進入輸入模式,再按滑鼠右鍵,即可複製進來,再儲存檔案即可。
|
[root@serCourse html]#
vi wp-config.php
[root@serCourse
html]#
ls wp-config.php
wp-config.php |
3.
完成之後,再回到網頁按
“執行安裝程式”。接著填寫網站相關資料,建立之後還可再修改,如下:
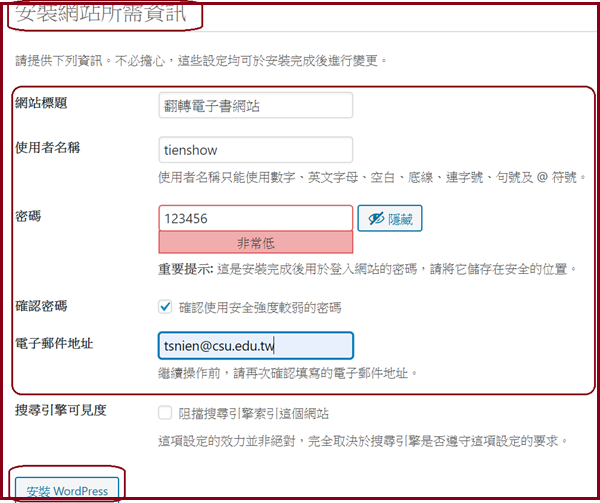
經過
1、2
分鐘安裝,即可完成:
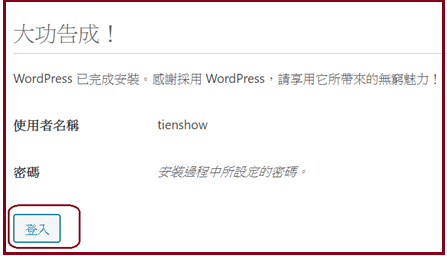
10-9-4
登入企業網站
即可使用所建立的帳號登入系統,此帳號與
MySQL 或 CentOS 帳號無關,如下:

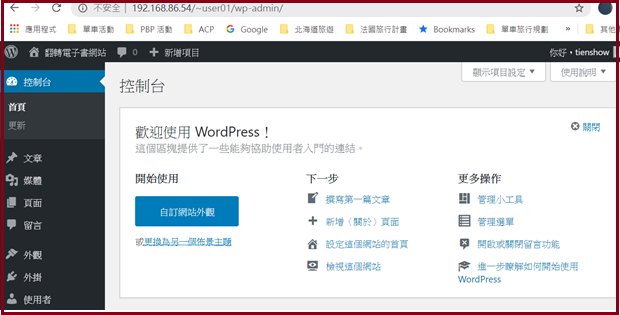
登入後,即可進入
WordPress
系統網站:
4. 瀏覽網站:(http://192.168.1.107)

5.
網站相關資訊
l
進入網站:http://IP。(http://192.168.1.107)
l
登入網站管理:http://IP/wp-admin。(http://192.168.1.107/wp-admin)
l
如果製作網站內容並非本課程,請自行研習或參考其他書籍。
|